Core Concepts: Missions, Armies, Units, Datasheets, Keywords And Redeployments
This section introduces various rules terms that you will find throughout the Core Rules and beyond. These key concepts form the basis of the Warhammer 40,000 rules, and are essential for every kind of battle.
Missions
To play a game of Warhammer 40,000, you must first select a mission. The mission will tell you how to muster your armies, create your battlefield and deploy your forces on the tabletop. It will also tell you any special rules that apply to the battle, and (most importantly!) what you need to do to win. You can find out more about missions on pages 57-58.
Armies
Each player in a game of Warhammer 40,000 commands an army of Citadel miniatures, hereafter referred to as models. The mission you have selected will guide you as to how big your army should be.

Units
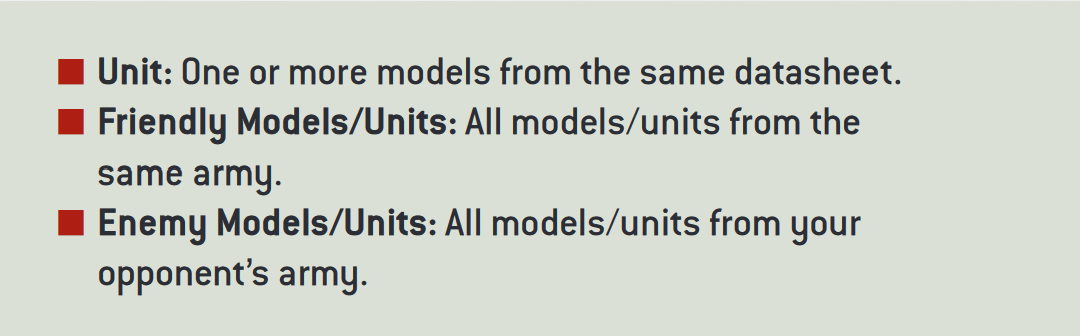
Models move and fight in units. A unit can have one or more models from a single datasheet (see below). Models and units from the same army are said to be friendly in relation to each other. Models and units from your opponent’s army are referred to as enemy models and units. If a rule affects ‘models’ or ‘units’ without specifying that they are friendly or enemy, that rule affects all models or all units, regardless of whose army they are in.
Datasheets
The rules you will need to use your models in games are presented on datasheets. Each unit has a datasheet; you will need the datasheets for all the units from your army. You can find out more about datasheets on pages 37-38.
Keywords
All datasheets have a list of keywords, separated into Faction keywords and other keywords. Faction keywords can be used to help you decide which models to include in your army, but otherwise both sets of keywords are functionally the same. In either case, keywords appear in Keyword Bold. Keywords are sometimes linked to (or ‘tagged’ by) a rule. For example, a rule might say that it applies to Infantry units. This means it only applies to units that have the Infantry keyword on their datasheet. The pluralisation (or otherwise) of keywords does not affect which units the rule in question applies to.
Redeployments
Rules that allow players to redeploy certain units after both armies are deployed (e.g. Huron Blackheart’s Red Corsairs ability) are always resolved after the Deploy Armies step (or, if you are playing a Crusade battle, after the Deploy Crusade Armies step), and before the Determine First Turn step, before determining who has the first turn. When a player uses such a rule, they remove that unit or units from the battlefield, then deploy them again using all the normal rules (for example, if all the models in one of these units have the Infiltrators ability, that unit’s player can set that unit up using that ability). Players alternate resolving any such rules, starting with the Attacker.
Core Concepts: Unit Coherency
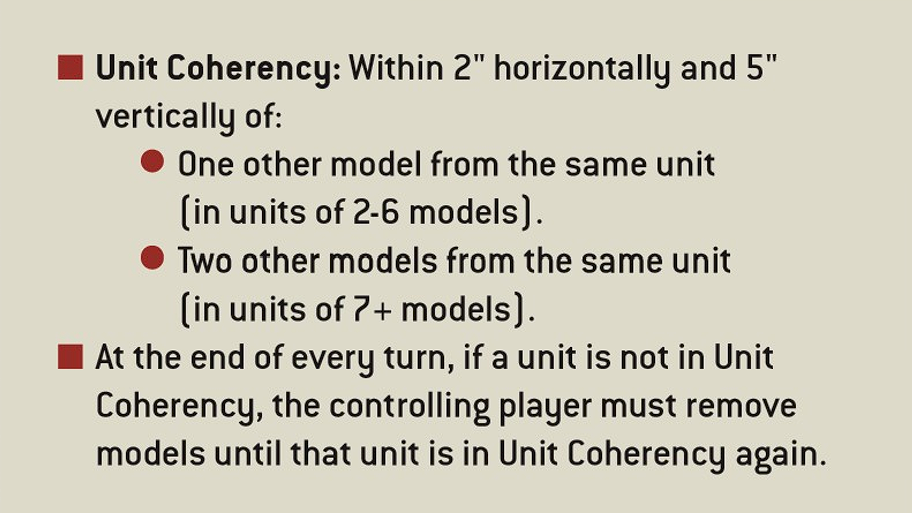
A unit that contains more than one model must be set up and end any kind of move as a single group, with all of its models within 2" horizontally and 5" vertically of at least one other model from that unit. While a unit has seven or more models, all of its models must instead be set up and end any kind of move within 2" horizontally and 5" vertically of at least two other models from that unit. This is called Unit Coherency.
If for any reason a model cannot be set up in Unit Coherency, or cannot be set up following any restrictions stated by other rules (e.g. while setting up using the Deep Strike ability), that unit cannot be set up. If a unit cannot end a move in Unit Coherency, it cannot make that move and its models are returned to their previous positions.
At the end of every turn, each player must remove models, one at a time, from any of the units from their armies that are no longer in Unit Coherency, until only a single group of models from each of those units remains in play and in Unit Coherency. Models removed in this way count as having been destroyed, but they never trigger any rules that apply when a model is destroyed.
Core Concepts: Measurements and the Battlefield
Hints and Tips
WOBBLY MODELS Sometimes you may find that a particular terrain feature makes it hard for you to place a model exactly where you want to. If you delicately balance a model in place, it is very likely to fall as soon as someone nudges the table, leaving your painted model damaged or even broken. In cases like this, provided it is still physically possible to place the model in the desired location, you may find it helps to leave a model in a safer position, provided both players agree and know its ‘actual’ location. If, later on, an enemy model is shooting the model, you will have to hold it back in place so that visibility can be determined.
Engagement Range
Engagement Range represents the zone of threat that models present to their enemies. While a model is within 1" horizontally and 5" vertically of an enemy model, those models – and their units – are within Engagement Range of each other. Models cannot be set up or end a Normal, Advance or Fall Back move within Engagement Range of any enemy models. If for any reason a model cannot meet this condition, that model is destroyed.

Battlefield
Battles of Warhammer 40,000 are fought on rectangular battlefields. This can be any surface upon which the models can stand – a dining table, for example, or the floor. Your mission will guide you as to the size of battlefield required
Terrain Features The scenery on a battlefield can be represented by models from the Warhammer 40,000 range. These models are called terrain features to differentiate them from the models that make up an army. Terrain features are set up on the battlefield before the battle begins. You can find out more about terrain features on pages 44-48. Unless the mission you are playing instructs you otherwise, you should feel free to create an exciting battlefield using any terrain features from your collection.
Measuring Distances Distances in Warhammer 40,000 are measured in inches ("). You can measure distances whenever you wish. When measuring the distance between models, measure between the closest points of the bases of the models you’re measuring to and from. If a model does not have a base, measure to the closest point of any part of that model instead. If a rule says it applies ‘within’ a certain distance, it applies at any distance that is not more than the specified distance. For example, within 1" means any distance that is not more than 1" away.
Core Concepts: Determining Visibility
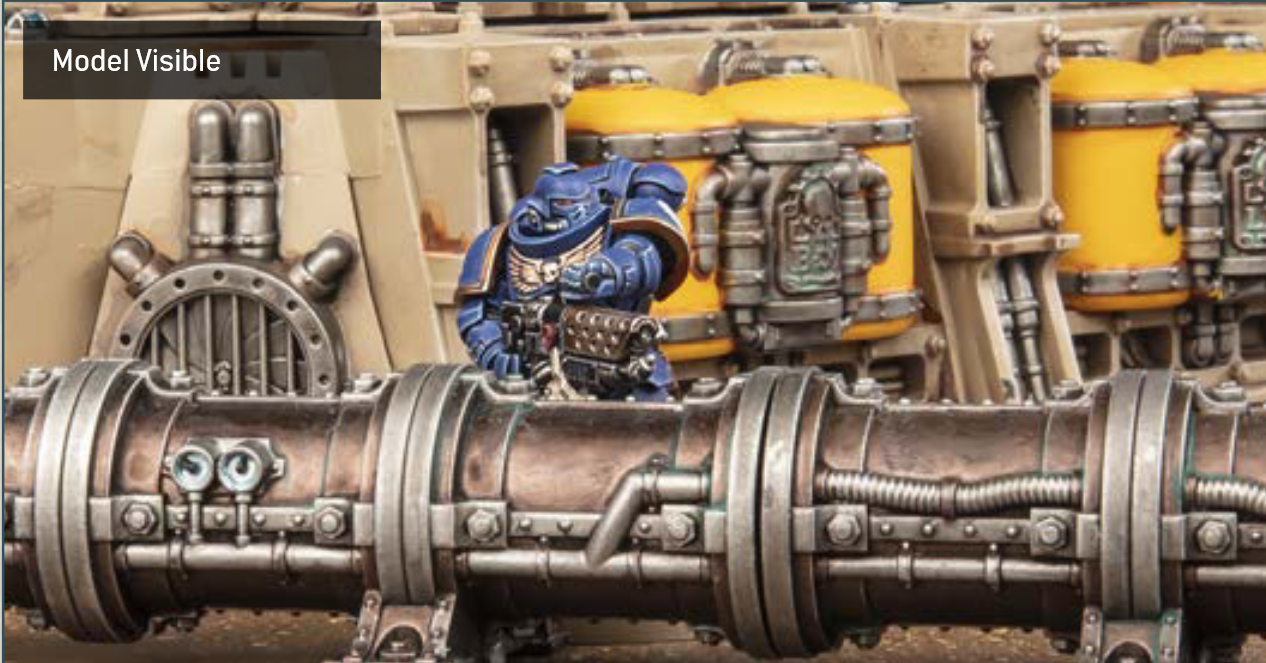
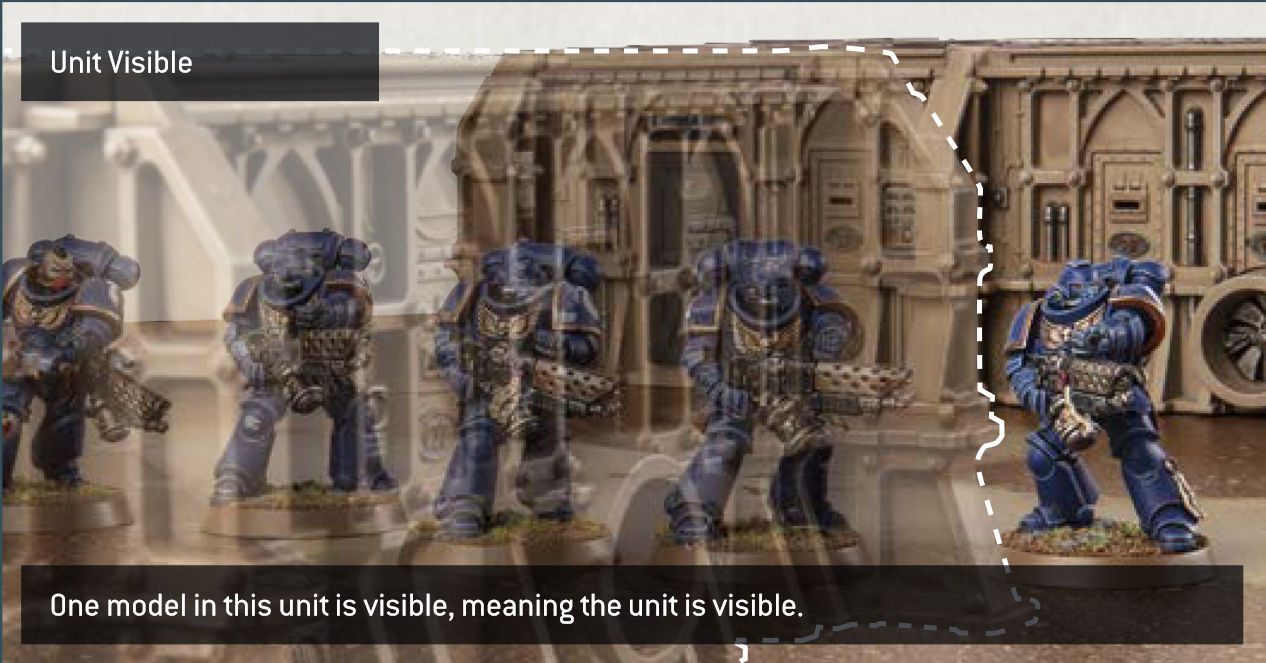
Warhammer 40,000 uses true line of sight to determine visibility between models. To check this, get a ‘model’s perspective’ view by looking from behind the observing model. For the purposes of determining visibility, an observing model can see through other models in its unit, and a model’s base is also part of that model
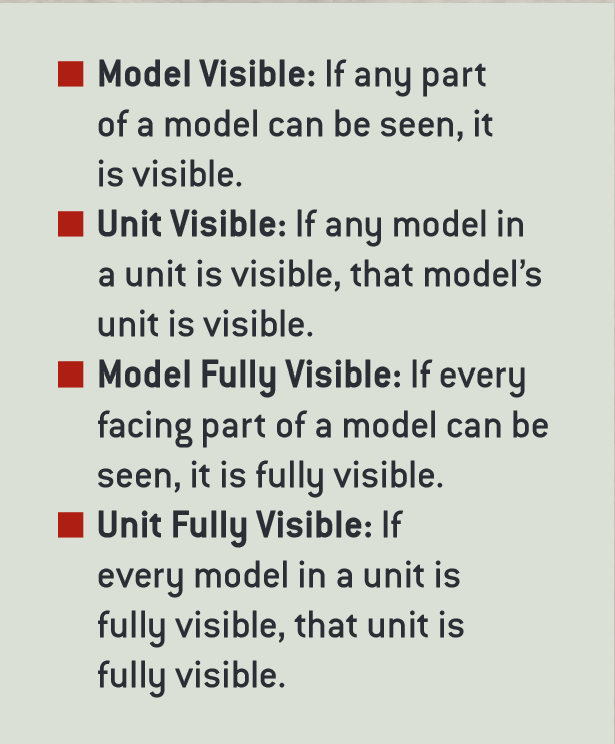
Model Visible If any part of another model can be seen from any part of the observing model, that other model is visible to the observing model.
Unit Visible If one or more models in a unit is visible to the observing model, then that model’s unit is visible to the observing model.
Model Fully Visible If every part of another model that is facing the observing model can be seen from any part of the observing model, then that other model is said to be fully visible to the observing model, i.e. the observing model has line of sight to all parts of the other model that are facing it, without any other models or terrain features blocking visibility to any of those parts.
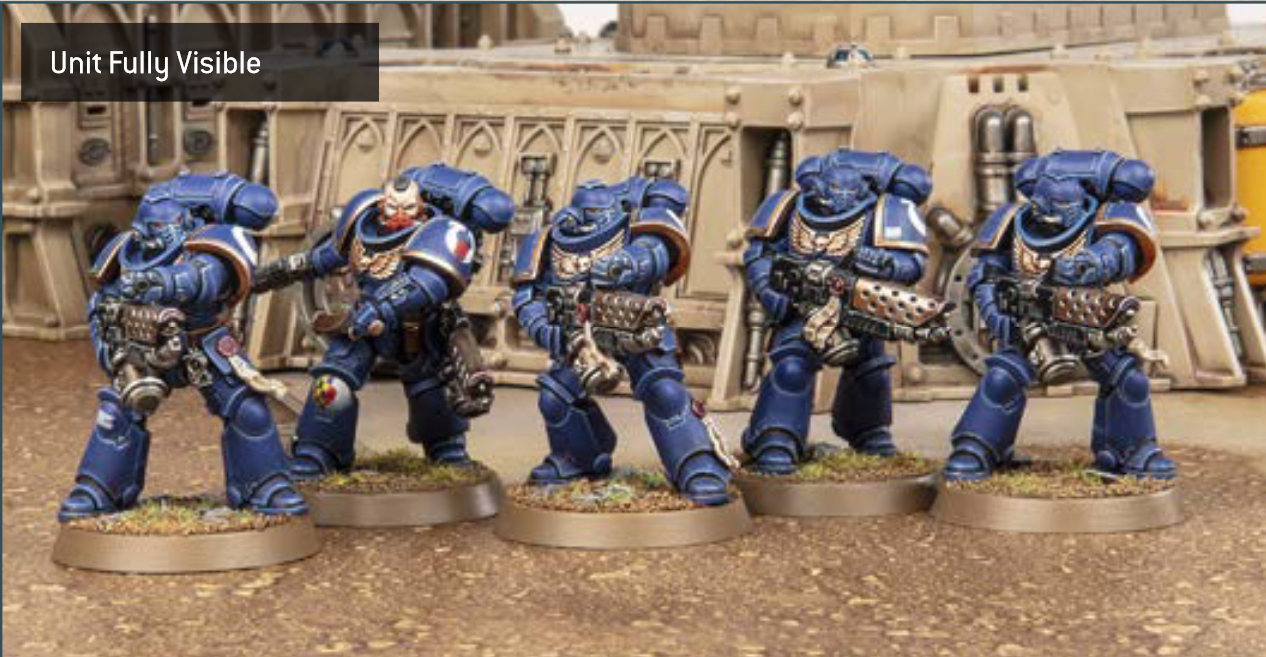
Unit Fully Visible If every model in a unit is fully visible to an observing model, then that unit is fully visible to that observing model. For the purposes of determining if an enemy unit is fully visible, an observing model can see through other models in the unit it is observing.

Core Concepts: Dice Rolling
Hints and Tips
Dice Rolling In a game of Warhammer 40,000 you and your opponent will be rolling, and in some cases re-rolling, lots of dice. It is good practice to always make sure your opponent knows what you are rolling dice for, and what abilities and rules are in effect that enable you to make any re-rolls. Many gamers roll their dice somewhere on the battlefield, but some roll their dice elsewhere, such as in a dice tray. Wherever you roll your dice, make sure you roll the dice where your opponent can see the results too. If a dice is rolled out of bounds (i.e. it rolls off your battlefield, out of your dice tray or ends up on the floor), it is very common to ignore the result of that dice and roll it again. Rolling an out-of-bounds dice again doesn’t count as having re-rolled that dice. If a dice does not lie flat on your battlefield after it has been thrown, it is called a cocked dice. Some players use a house rule that unless a dice is flat after it has been rolled, or unless you can balance another dice on top of a cocked dice without it sliding off, it must be rolled again. It is more common for players to roll the dice again only if they can’t be sure of the result. In any case, rolling a cocked dice again doesn’t count as having re-rolled that dice.
Dice
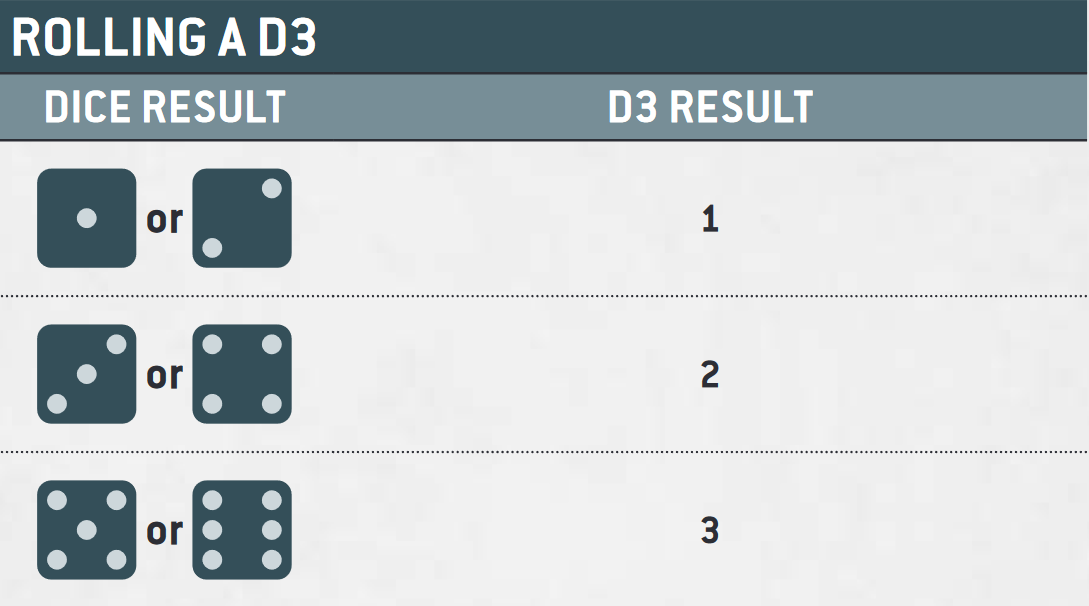
In order to fight a battle, you will require some six-sided dice (often abbreviated to D6). Some rules refer to 2D6, 3D6 and so on – in such cases, roll that many D6 and add the results together. If a rule requires you to roll a D3, roll a D6 and halve the result (rounding up to a whole number) to get the D3 result, as shown below.
If a rule requires a dice roll of, for example, 3 or more, this is often abbreviated to 3+. Where several consecutive dice results are relevant to a rule, these are often shown as a range (e.g. 1-3).
Re-Rolls
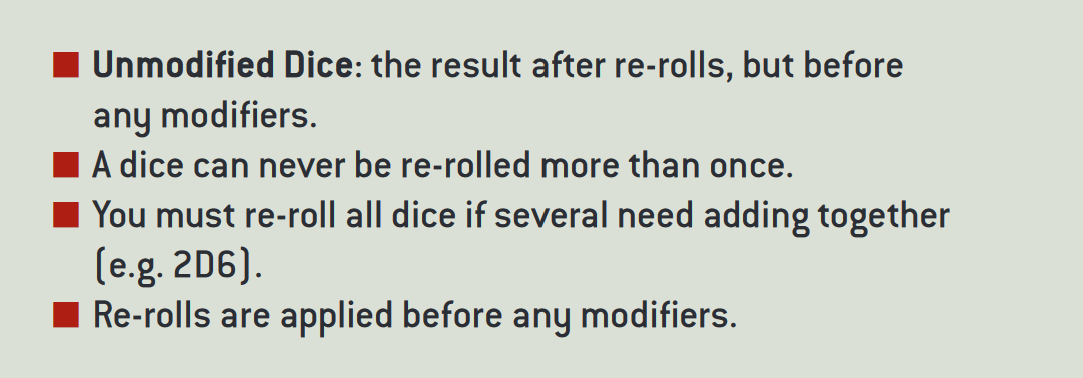
Some rules allow you to re-roll a dice roll, which means you get to roll some or all of the dice again. If a rule allows you to re-roll a dice roll that was made by adding several dice together (e.g. 2D6, 3D6, etc.) then, unless otherwise stated, you must re-roll all of those dice again. You can never re-roll a dice more than once, and re-rolls happen before modifiers (if any) are applied. Rules that refer to the value of an ‘unmodified’ dice roll are referring to the dice result after any re-rolls, but before any modifiers are applied.
Roll Offs Some rules instruct players to roll off. To do so, both players roll one D6, and whoever scores highest wins the roll-off. If there is a tie for the highest roll, roll off again. Neither player is allowed to re-roll or modify any of the D6 when making a roll-off.
Sequencing While playing Warhammer 40,000, you’ll occasionally find that two or more rules are to be resolved at the same time. If this occurs during the battle, the player whose turn it is chooses the order. If this occurs before or after the battle, or at the start or end of a battle round, the players roll off and the winner decides the order in which those rules are resolved.
The Battle Round
Minute by bloody minute the battle grinds on, from the opening volleys of shots through furious offensives and desperate counter-attacks, into the last dying moments when victory hangs by a thread.
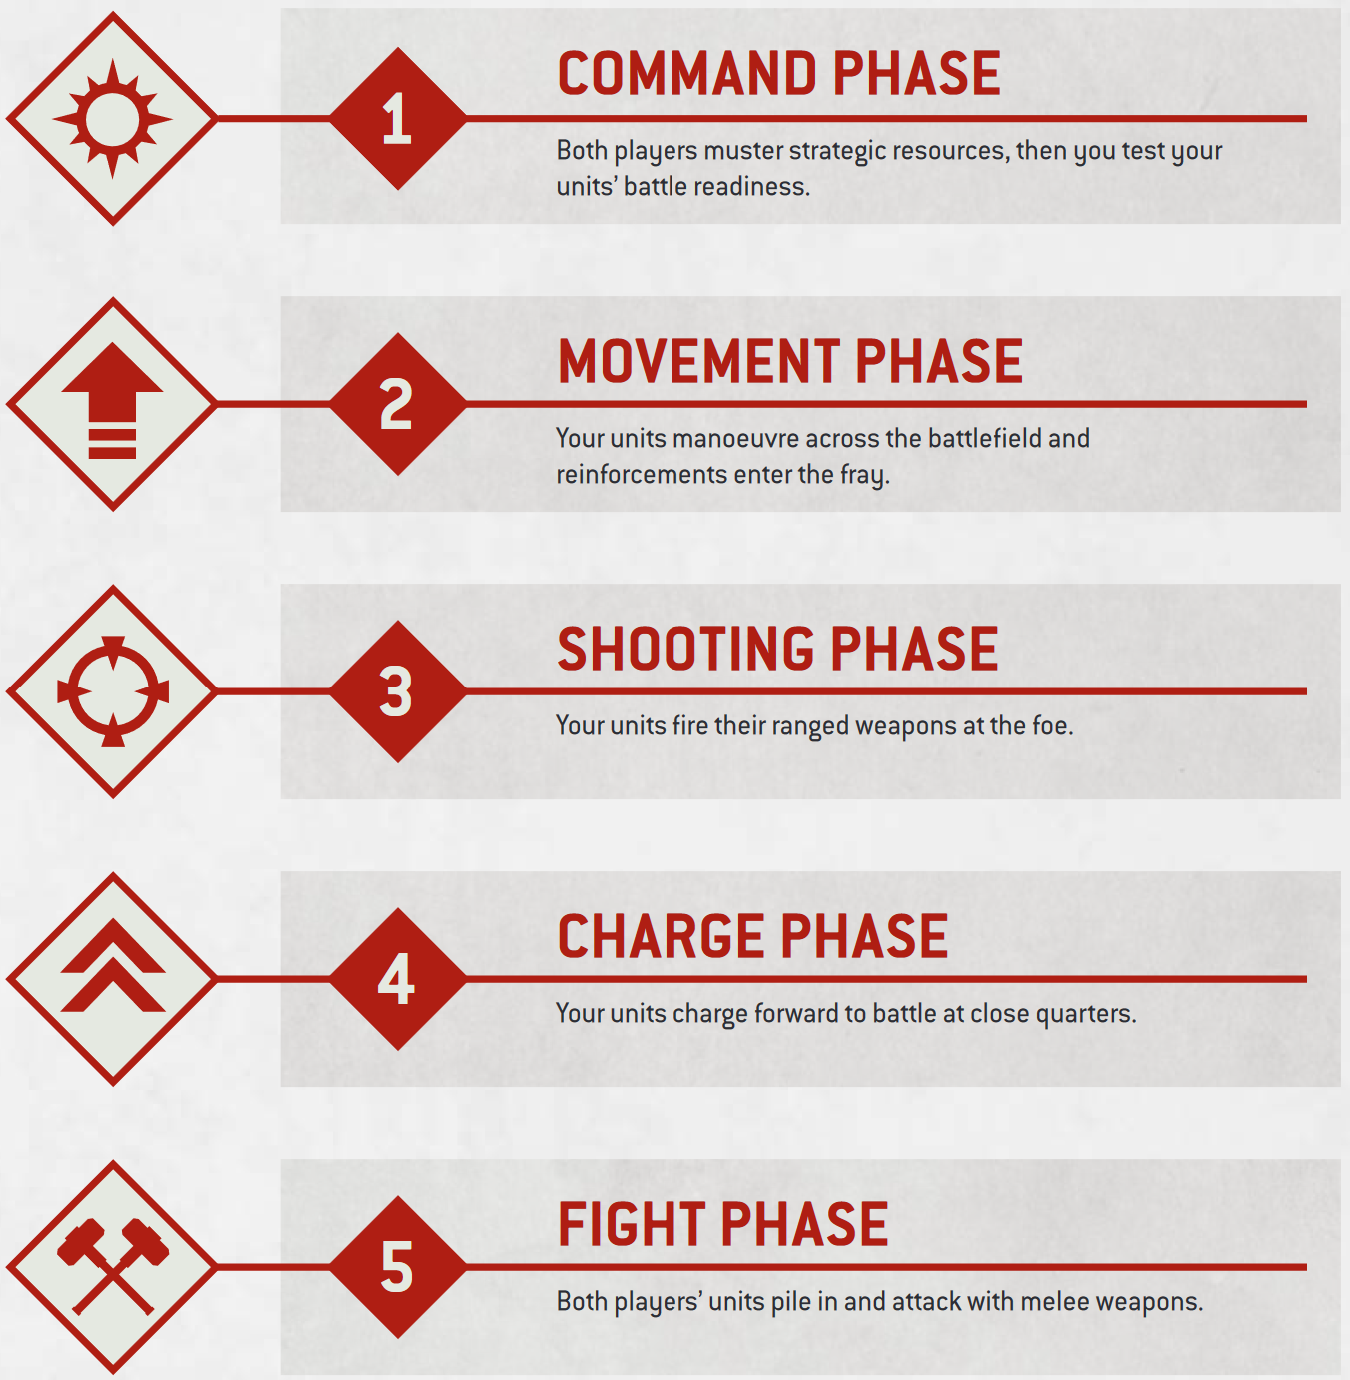
Warhammer 40,000 is played in a series of battle rounds. In each battle round, both players have a turn. The same player always takes the first turn in each battle round – the mission you are playing will tell you which player this is. Each turn consists of a series of phases, which must be resolved in the following order.
Out Of Phase Rules Some rules allow a model or unit to move, shoot, charge or fight outside of the normal turn sequence. For example, the Fire Overwatch Stratagem enables a unit to shoot in your opponent’s turn as if it were your Shooting phase. When using out-of-phase rules to perform an action as if it were one of your phases, you cannot use any other rules that are normally triggered in that phase.
Out Of Phase Example: In your opponent’s Movement phase, you use the Fire Overwatch Stratagem to enable a Whirlwind from your army to shoot as if it were your Shooting phase. The Whirlwind has the Pinning Bombardment ability, which is used ‘In your Shooting phase, after this model has shot’. Because Fire Overwatch is an out-of-phase rule, it only allows the Whirlwind to perform the specified action (in this case, shooting as if it were your Shooting phase) and does not trigger any other rules that would normally be used in your Shooting phase. This means the Whirlwind’s Pinning Bombardment ability has no effect while resolving these attacks, and you could not use any other Stratagems that are used in your Shooting phase to affect those attacks.
Persisting Effects Some rules apply an effect that lasts until a certain duration has passed (e.g. until the start of your next turn). Such effects are known as persisting effects. If a persisting effect applies to a unit when it embarks within a Transport, make a note of that effect and its duration; if that unit disembarks for any reason, any persisting effects continue to apply to that unit for their full duration. If a persisting effect applies to an Attached unit and that unit ceases to be an Attached unit (because either all of its Bodyguard models or all of its Leader models are destroyed), any persisting effects continue to apply to the surviving unit(s) for their full duration.
Completing a Battle Round Once a player’s turn has ended, their opponent then starts their turn. Once both players have completed a turn, the battle round has been completed and the next one begins, and so on, until the battle ends.
Command Phase
Commanders gauge the flow of the battle, consolidating their objectives before making alterations to their battle plans and devising new tactics and strategies with which to defeat the foe.
Your Command phase is split into two steps. In the first, both players gain 1 Command point (CP) and you resolve any other Command phase rules; in the second, you test to see if any of your units are Battle-shocked.

Gaining Command Points Outside of the 1CP players gain at the start of the Command phase (see "Command" section on this page), each player can only gain a total of 1CP per battle round, regardless of the source (this includes other CP gained at the start of the Command phase).
Command At the start of your Command phase, before doing anything else, both players gain 1CP. Command points are a strategic resource that you can spend during the battle to use Stratagems. You can find out more about Stratagems on pages 41-42. Then, if you have any other rules that need to be resolved in the Command phase, you do so now before progressing to the Battle-shock step.

Battleshock In this step, you must take a Battle-shock test for each of your units on the battlefield that is Below Half-strength (pg 12). To do so, roll 2D6: if the result is greater than or equal to the best Leadership characteristic in that unit, the test is passed; otherwise, the test is failed and, until the start of your next Command phase, that unit is Battle-shocked.
While a unit is Battle-shocked:
- The Objective Control characteristic of all of its models is 0.
- If it Falls Back, you must take a Desperate Escape test for every model in that unit (pg 14).
- Its controlling player cannot use Stratagems to affect that unit.
In this step, if for any reason a unit is forced to take a Battle-shock test for being below its Starting Strength, unless otherwise stated, that unit does not also have to take a Battle-shock test for being Below Half-strength. While a unit is Battle-shocked, all models in that unit are also Battle-shocked.
Command Phase Continued
Starting Strength The number of models a unit contains when it is added to your army is known as its Starting Strength.
Below Half Strength Some rules will refer to a unit being Below Half-strength.
- If a unit has a Starting Strength of 1, then it is said to be Below Half-strength while its remaining number of wounds is less than half of its Wounds characteristic.
- For any other unit, while the number of models in that unit is less than half of its Starting Strength, that unit is said to be Below Half-strength.
Destroyed Throughout a battle, models will suffer damage and be destroyed. When a model is destroyed, it is removed from the battlefield. When every model in a unit has been destroyed, that unit is destroyed.
Attached Units Some Character units have the Leader ability (pg 39), which lets them merge with other units (known as Bodyguard units) to form an Attached unit.
The Starting Strength of an Attached unit is equal to the combined Starting Strengths of all of its units (i.e. the number of models in the Leader unit added to the number of models in the Bodyguard unit). If either the Leader unit or the Bodyguard unit in an Attached unit is destroyed, the Starting Strength of the remaining unit is changed to be equal to its original Starting Strength.
Example: A Primaris Captain (Starting Strength 1) is attached to a unit of Intercessors (Starting Strength 5). This Attached unit has a Starting Strength of 6. If all the Intercessors are destroyed, the remaining Primaris Captain would revert to having a Starting Strength of 1.
For the purposes of rules that are triggered when a unit is destroyed, such rules are still triggered when one of the individual units that made up an Attached unit is destroyed (the Leader or the Bodyguard unit).
Example: If a rule awards you with 1VP each time an enemy unit is destroyed, and you target an Attached unit, you would gain 1VP if the Bodyguard unit is destroyed and 1VP if the Leader unit is destroyed (for a total of 2VP).
Movement Phase
Lorem Ipsum
Praesent tincidunt sed tellus ut rutrum. Sed vitae justo condimentum, porta lectus vitae, ultricies congue gravida diam non fringilla.
Lorem Ipsum
Praesent tincidunt sed tellus ut rutrum. Sed vitae justo condimentum, porta lectus vitae, ultricies congue gravida diam non fringilla.
Lorem Ipsum
Praesent tincidunt sed tellus ut rutrum. Sed vitae justo condimentum, porta lectus vitae, ultricies congue gravida diam non fringilla.
Lorem Ipsum
Praesent tincidunt sed tellus ut rutrum. Sed vitae justo condimentum, porta lectus vitae, ultricies congue gravida diam non fringilla.
Lorem Ipsum
Praesent tincidunt sed tellus ut rutrum. Sed vitae justo condimentum, porta lectus vitae, ultricies congue gravida diam non fringilla.
Lorem Ipsum
Praesent tincidunt sed tellus ut rutrum. Sed vitae justo condimentum, porta lectus vitae, ultricies congue gravida diam non fringilla.
Shooting Phase
Lorem Ipsum
Praesent tincidunt sed tellus ut rutrum. Sed vitae justo condimentum, porta lectus vitae, ultricies congue gravida diam non fringilla.
Lorem Ipsum
Praesent tincidunt sed tellus ut rutrum. Sed vitae justo condimentum, porta lectus vitae, ultricies congue gravida diam non fringilla.
Lorem Ipsum
Praesent tincidunt sed tellus ut rutrum. Sed vitae justo condimentum, porta lectus vitae, ultricies congue gravida diam non fringilla.
Lorem Ipsum
Praesent tincidunt sed tellus ut rutrum. Sed vitae justo condimentum, porta lectus vitae, ultricies congue gravida diam non fringilla.
Lorem Ipsum
Praesent tincidunt sed tellus ut rutrum. Sed vitae justo condimentum, porta lectus vitae, ultricies congue gravida diam non fringilla.
Lorem Ipsum
Praesent tincidunt sed tellus ut rutrum. Sed vitae justo condimentum, porta lectus vitae, ultricies congue gravida diam non fringilla.
Charge Phase
Lorem Ipsum
Praesent tincidunt sed tellus ut rutrum. Sed vitae justo condimentum, porta lectus vitae, ultricies congue gravida diam non fringilla.
Lorem Ipsum
Praesent tincidunt sed tellus ut rutrum. Sed vitae justo condimentum, porta lectus vitae, ultricies congue gravida diam non fringilla.
Lorem Ipsum
Praesent tincidunt sed tellus ut rutrum. Sed vitae justo condimentum, porta lectus vitae, ultricies congue gravida diam non fringilla.
Lorem Ipsum
Praesent tincidunt sed tellus ut rutrum. Sed vitae justo condimentum, porta lectus vitae, ultricies congue gravida diam non fringilla.
Lorem Ipsum
Praesent tincidunt sed tellus ut rutrum. Sed vitae justo condimentum, porta lectus vitae, ultricies congue gravida diam non fringilla.
Lorem Ipsum
Praesent tincidunt sed tellus ut rutrum. Sed vitae justo condimentum, porta lectus vitae, ultricies congue gravida diam non fringilla.
Fight Phase
Lorem Ipsum
Praesent tincidunt sed tellus ut rutrum. Sed vitae justo condimentum, porta lectus vitae, ultricies congue gravida diam non fringilla.
Lorem Ipsum
Praesent tincidunt sed tellus ut rutrum. Sed vitae justo condimentum, porta lectus vitae, ultricies congue gravida diam non fringilla.
Lorem Ipsum
Praesent tincidunt sed tellus ut rutrum. Sed vitae justo condimentum, porta lectus vitae, ultricies congue gravida diam non fringilla.
Lorem Ipsum
Praesent tincidunt sed tellus ut rutrum. Sed vitae justo condimentum, porta lectus vitae, ultricies congue gravida diam non fringilla.
Lorem Ipsum
Praesent tincidunt sed tellus ut rutrum. Sed vitae justo condimentum, porta lectus vitae, ultricies congue gravida diam non fringilla.
Lorem Ipsum
Praesent tincidunt sed tellus ut rutrum. Sed vitae justo condimentum, porta lectus vitae, ultricies congue gravida diam non fringilla.
Data Sheets And Unit Abilities
Lorem Ipsum
Praesent tincidunt sed tellus ut rutrum. Sed vitae justo condimentum, porta lectus vitae, ultricies congue gravida diam non fringilla.
Lorem Ipsum
Praesent tincidunt sed tellus ut rutrum. Sed vitae justo condimentum, porta lectus vitae, ultricies congue gravida diam non fringilla.
Lorem Ipsum
Praesent tincidunt sed tellus ut rutrum. Sed vitae justo condimentum, porta lectus vitae, ultricies congue gravida diam non fringilla.
Lorem Ipsum
Praesent tincidunt sed tellus ut rutrum. Sed vitae justo condimentum, porta lectus vitae, ultricies congue gravida diam non fringilla.
Lorem Ipsum
Praesent tincidunt sed tellus ut rutrum. Sed vitae justo condimentum, porta lectus vitae, ultricies congue gravida diam non fringilla.
Lorem Ipsum
Praesent tincidunt sed tellus ut rutrum. Sed vitae justo condimentum, porta lectus vitae, ultricies congue gravida diam non fringilla.
Strategic Reserves And Strategems
Lorem Ipsum
Praesent tincidunt sed tellus ut rutrum. Sed vitae justo condimentum, porta lectus vitae, ultricies congue gravida diam non fringilla.
Lorem Ipsum
Praesent tincidunt sed tellus ut rutrum. Sed vitae justo condimentum, porta lectus vitae, ultricies congue gravida diam non fringilla.
Lorem Ipsum
Praesent tincidunt sed tellus ut rutrum. Sed vitae justo condimentum, porta lectus vitae, ultricies congue gravida diam non fringilla.
Lorem Ipsum
Praesent tincidunt sed tellus ut rutrum. Sed vitae justo condimentum, porta lectus vitae, ultricies congue gravida diam non fringilla.
Lorem Ipsum
Praesent tincidunt sed tellus ut rutrum. Sed vitae justo condimentum, porta lectus vitae, ultricies congue gravida diam non fringilla.
Lorem Ipsum
Praesent tincidunt sed tellus ut rutrum. Sed vitae justo condimentum, porta lectus vitae, ultricies congue gravida diam non fringilla.
Terrain Features
Lorem Ipsum
Praesent tincidunt sed tellus ut rutrum. Sed vitae justo condimentum, porta lectus vitae, ultricies congue gravida diam non fringilla.
Lorem Ipsum
Praesent tincidunt sed tellus ut rutrum. Sed vitae justo condimentum, porta lectus vitae, ultricies congue gravida diam non fringilla.
Lorem Ipsum
Praesent tincidunt sed tellus ut rutrum. Sed vitae justo condimentum, porta lectus vitae, ultricies congue gravida diam non fringilla.
Lorem Ipsum
Praesent tincidunt sed tellus ut rutrum. Sed vitae justo condimentum, porta lectus vitae, ultricies congue gravida diam non fringilla.
Lorem Ipsum
Praesent tincidunt sed tellus ut rutrum. Sed vitae justo condimentum, porta lectus vitae, ultricies congue gravida diam non fringilla.
Lorem Ipsum
Praesent tincidunt sed tellus ut rutrum. Sed vitae justo condimentum, porta lectus vitae, ultricies congue gravida diam non fringilla.
Muster Your Army
Lorem Ipsum
Praesent tincidunt sed tellus ut rutrum. Sed vitae justo condimentum, porta lectus vitae, ultricies congue gravida diam non fringilla.
Lorem Ipsum
Praesent tincidunt sed tellus ut rutrum. Sed vitae justo condimentum, porta lectus vitae, ultricies congue gravida diam non fringilla.
Lorem Ipsum
Praesent tincidunt sed tellus ut rutrum. Sed vitae justo condimentum, porta lectus vitae, ultricies congue gravida diam non fringilla.
Lorem Ipsum
Praesent tincidunt sed tellus ut rutrum. Sed vitae justo condimentum, porta lectus vitae, ultricies congue gravida diam non fringilla.
Lorem Ipsum
Praesent tincidunt sed tellus ut rutrum. Sed vitae justo condimentum, porta lectus vitae, ultricies congue gravida diam non fringilla.
Lorem Ipsum
Praesent tincidunt sed tellus ut rutrum. Sed vitae justo condimentum, porta lectus vitae, ultricies congue gravida diam non fringilla.
Missions
Lorem Ipsum
Praesent tincidunt sed tellus ut rutrum. Sed vitae justo condimentum, porta lectus vitae, ultricies congue gravida diam non fringilla.
Lorem Ipsum
Praesent tincidunt sed tellus ut rutrum. Sed vitae justo condimentum, porta lectus vitae, ultricies congue gravida diam non fringilla.
Lorem Ipsum
Praesent tincidunt sed tellus ut rutrum. Sed vitae justo condimentum, porta lectus vitae, ultricies congue gravida diam non fringilla.
Lorem Ipsum
Praesent tincidunt sed tellus ut rutrum. Sed vitae justo condimentum, porta lectus vitae, ultricies congue gravida diam non fringilla.
Lorem Ipsum
Praesent tincidunt sed tellus ut rutrum. Sed vitae justo condimentum, porta lectus vitae, ultricies congue gravida diam non fringilla.
Lorem Ipsum
Praesent tincidunt sed tellus ut rutrum. Sed vitae justo condimentum, porta lectus vitae, ultricies congue gravida diam non fringilla.